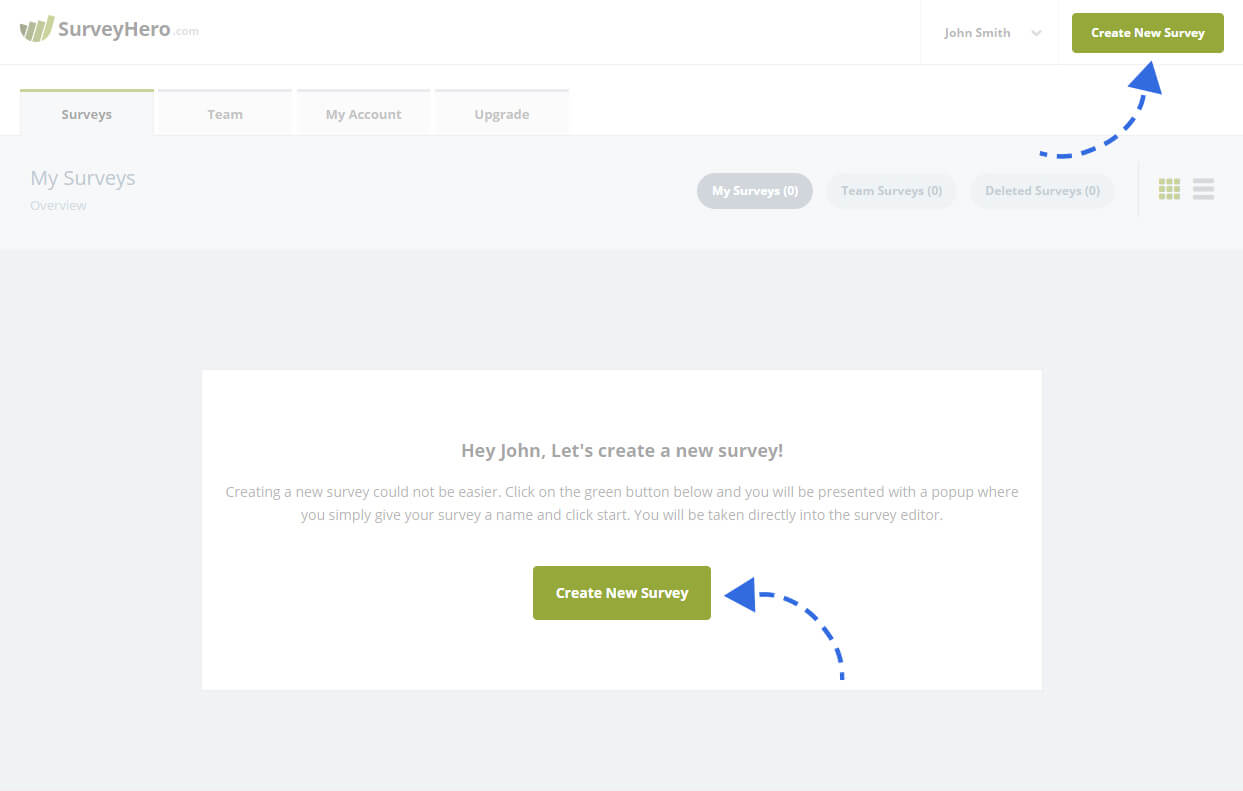
Create a New Survey
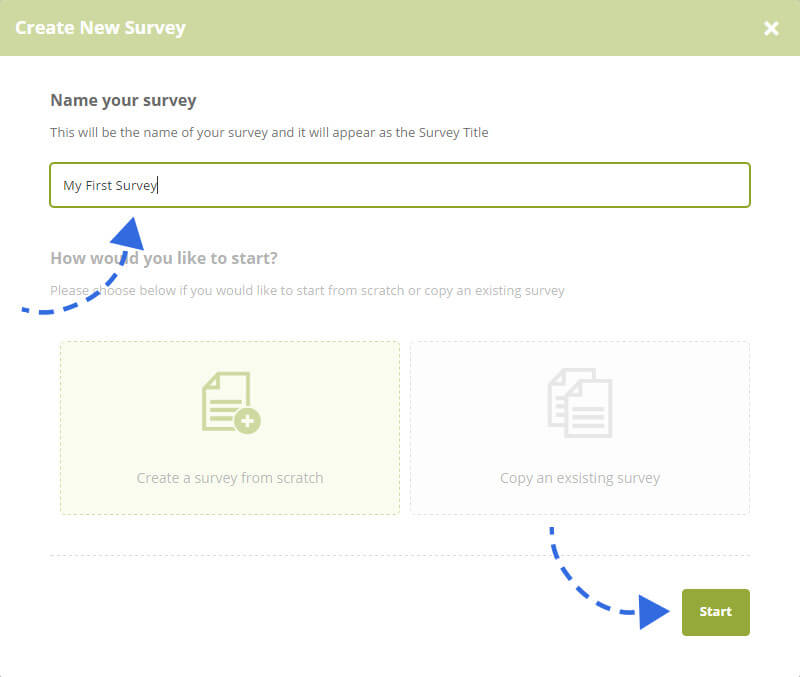
To create a new survey, make sure you are logged in and then click on the “Create New Survey” button on the upper right side of your account area. This will open up the Create New Survey Overlay. Give your survey a name and click the “Start” button when you are done.
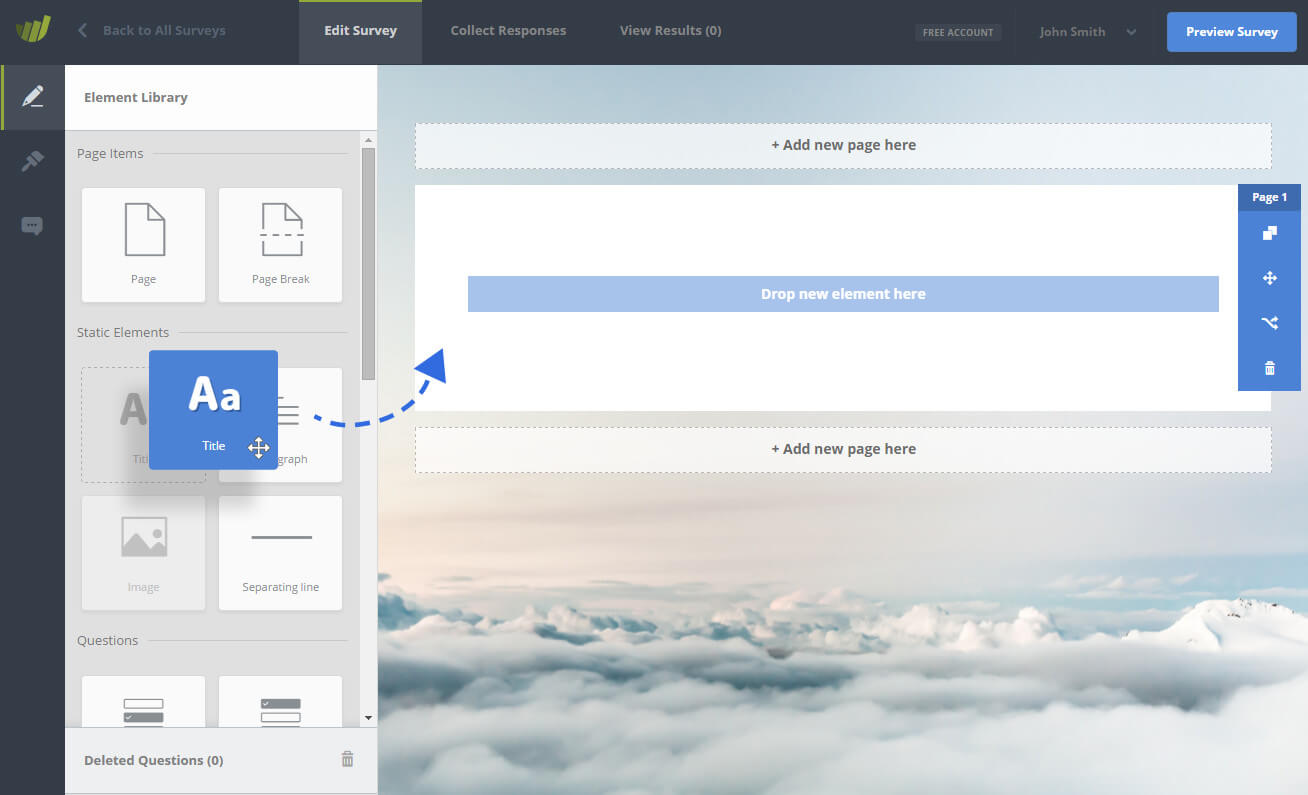
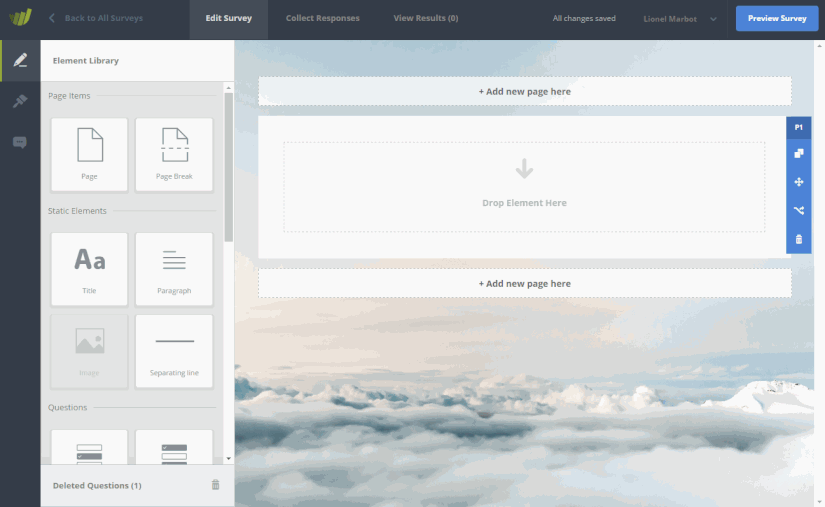
Build your Questionnaire
You will be taken directly into the survey editor. Here you can start adding elements and building your questionnaire. We have a great selection of question types for you to choose from. Each question type and element can be found in the side panel of the builder. Simply drag and drop whatever you need into your page.
When you add an element onto the page, the settings for that element will automatically slide open. For each element type, there are different customization options available in the settings panel. For example, you can add rows or columns to multiple choice questions or change the text. Another really simple way to change the text in your questionnaire is to use our inline editing feature. Simply click on any text and start typing. You can also select some text and use the toolbar to apply some simple text formatting if you wish. Any changes that you make, either in the settings panel or via inline editing will be automatically saved (no need to press a save button!). You can see the saved status on the top right side of the screen.
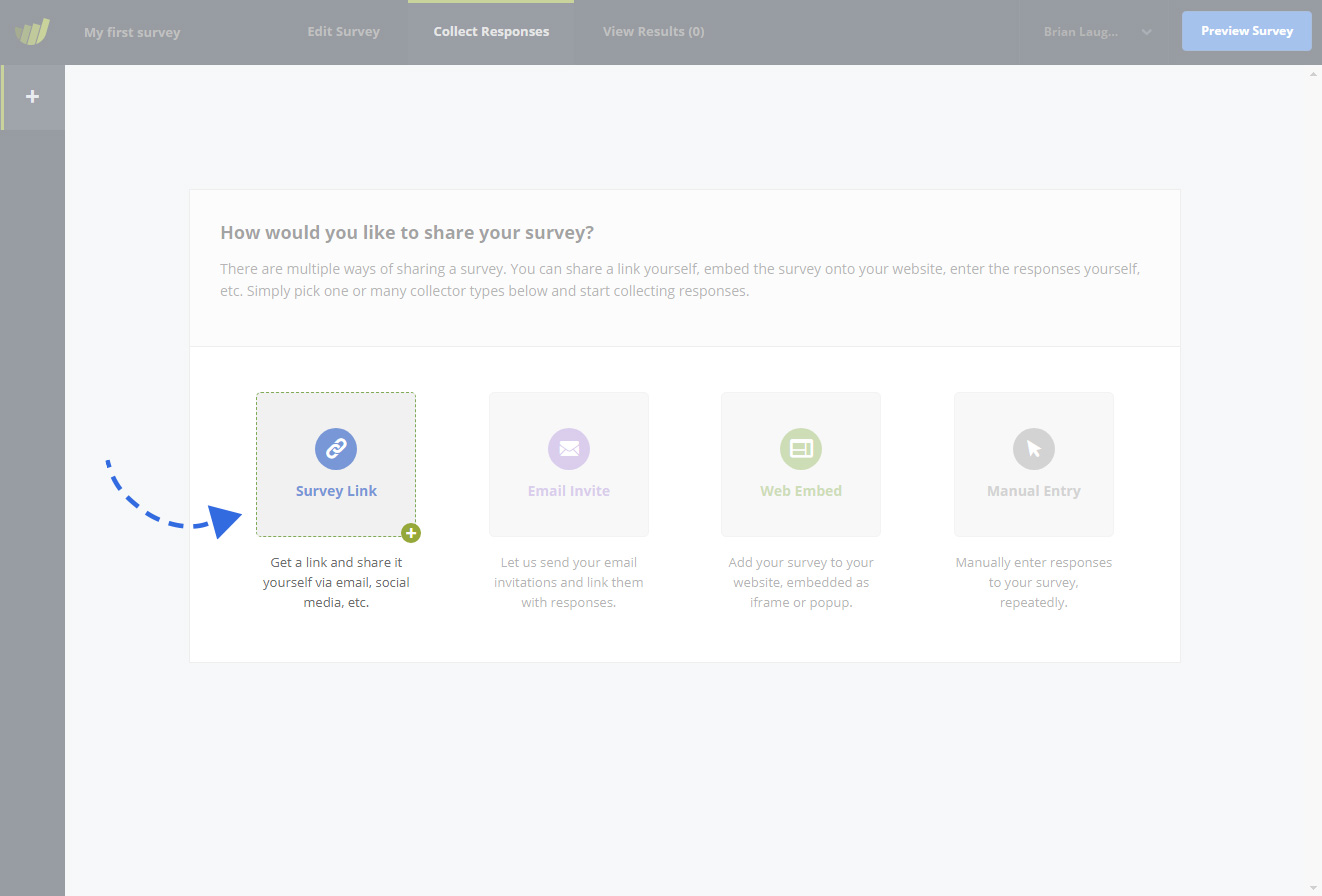
Create a Collector
When you are happy with your questionnaire and you have all the questions you need, the next step is to go to the “Collect Responses” section and create a Collector.
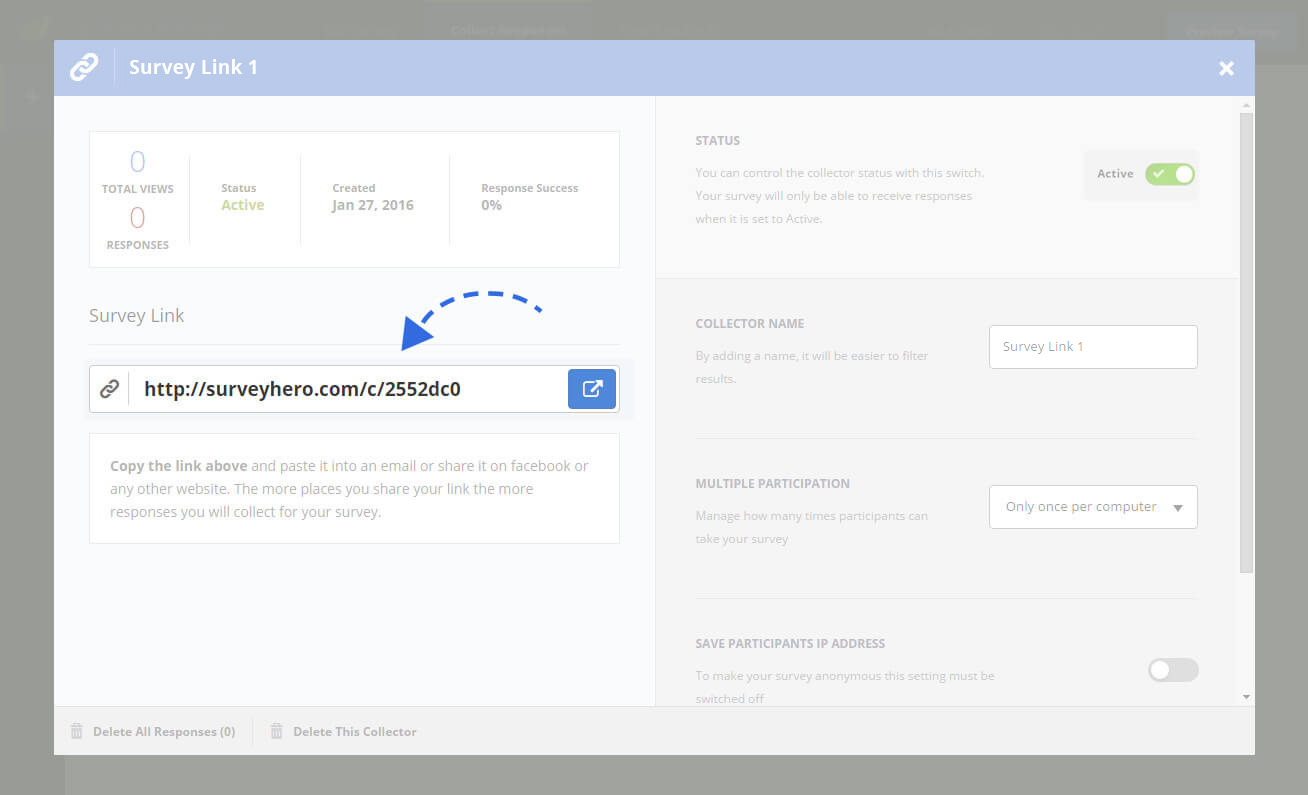
Collectors allow you to start recording responses for your survey. Each collector type has its own function and customization settings. Let’s start by adding the most common collector type, a “Survey Link”. First, you must give your collector a name. This will be useful later when you start filtering the responses. The next screen you see will be the collector settings. Here you will be able to change the settings for this specific collector, but most importantly, this is where you get your Collector Survey Link. You will be sending this link to your potential survey respondents.
You can copy and paste the link into an Email, Tweet or a Facebook post for example. The more places you share the link the higher the chance that you will get a larger number of responses. You can create as many collectors as you need; there are no limits. For example, you could create multiple collectors for each of your customer groups and then you will be able to create specific customer group reports.
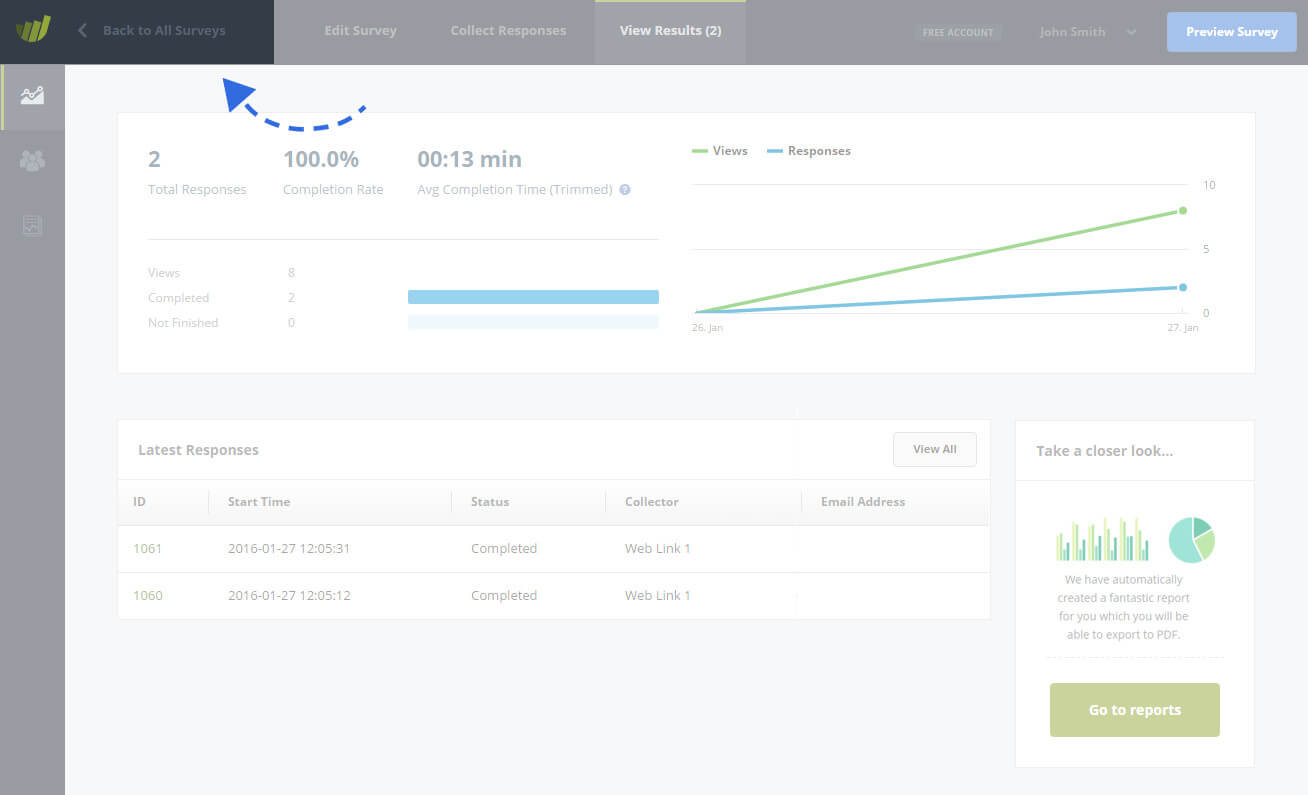
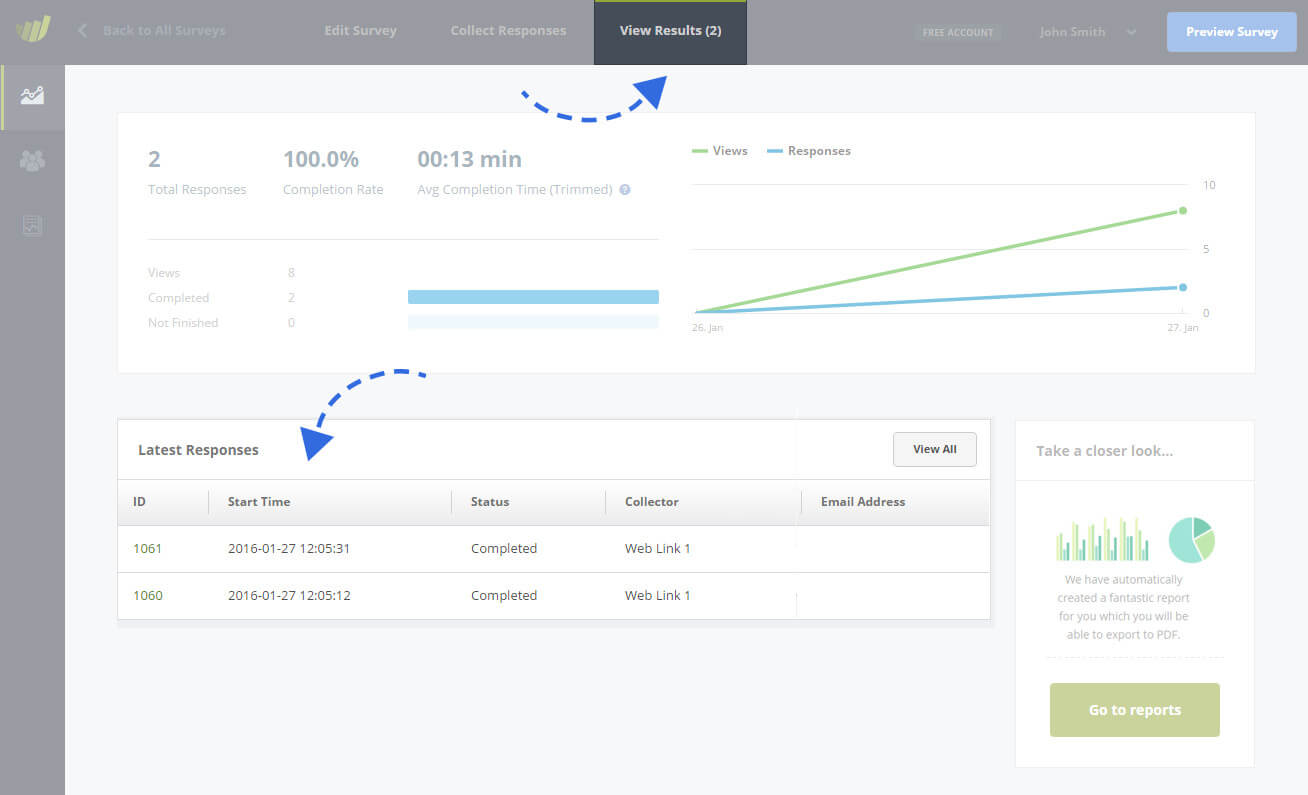
Analyze your results
After you have created your questionnaire, added a collector and shared your survey with people, you can expect to see the responses start coming in. Go to the “View Results” section to see an overview of all survey responses to date. Here you will be able to view each response individually and filter the results based on certain criteria, such as, collector, date, survey completion, etc.
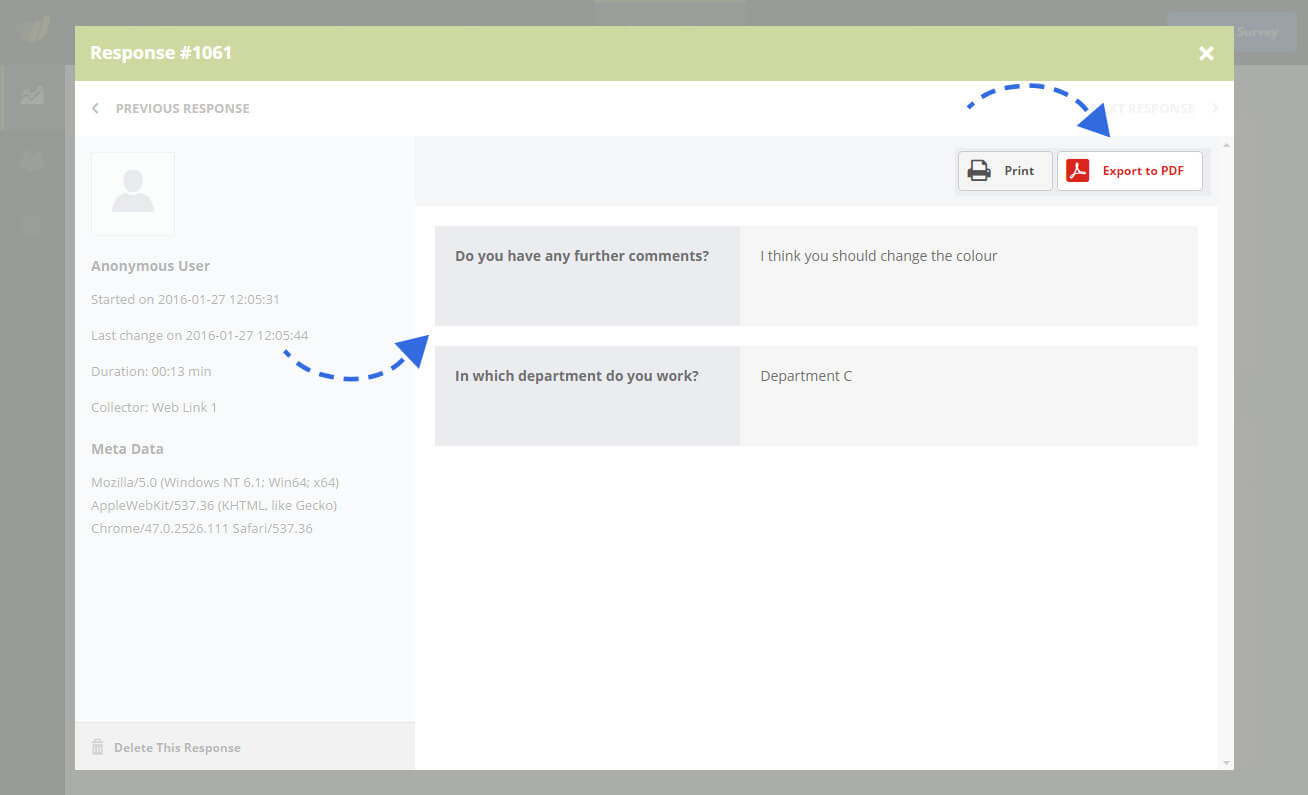
Each individual response can be found in the responses table. Clicking on any row in the table will open up an overlay that will show you each response individually. Here you will only see the data related to that response, with an option to print or export to PDF.
Congratulations! You conducted your first survey!
That’s it! In just a few steps, you have created, shared and collected responses for your survey! On the upper left side of the survey editor, you will find the “Back to All Surveys” button, click there to go back to your account area and view an overview of your surveys.