We make it easy for you to send email invitations to invite people to participate in your online survey. You can add an unlimited number of recipients directly from Excel or any other spreadsheet by simply copying and pasting. We also give you the ability to write your own message and will automatically generate a unique survey link for each recipient. The recipient’s email address will appear in each individual response as well as in your exports.
How to send email invitations
Create your email invite collector
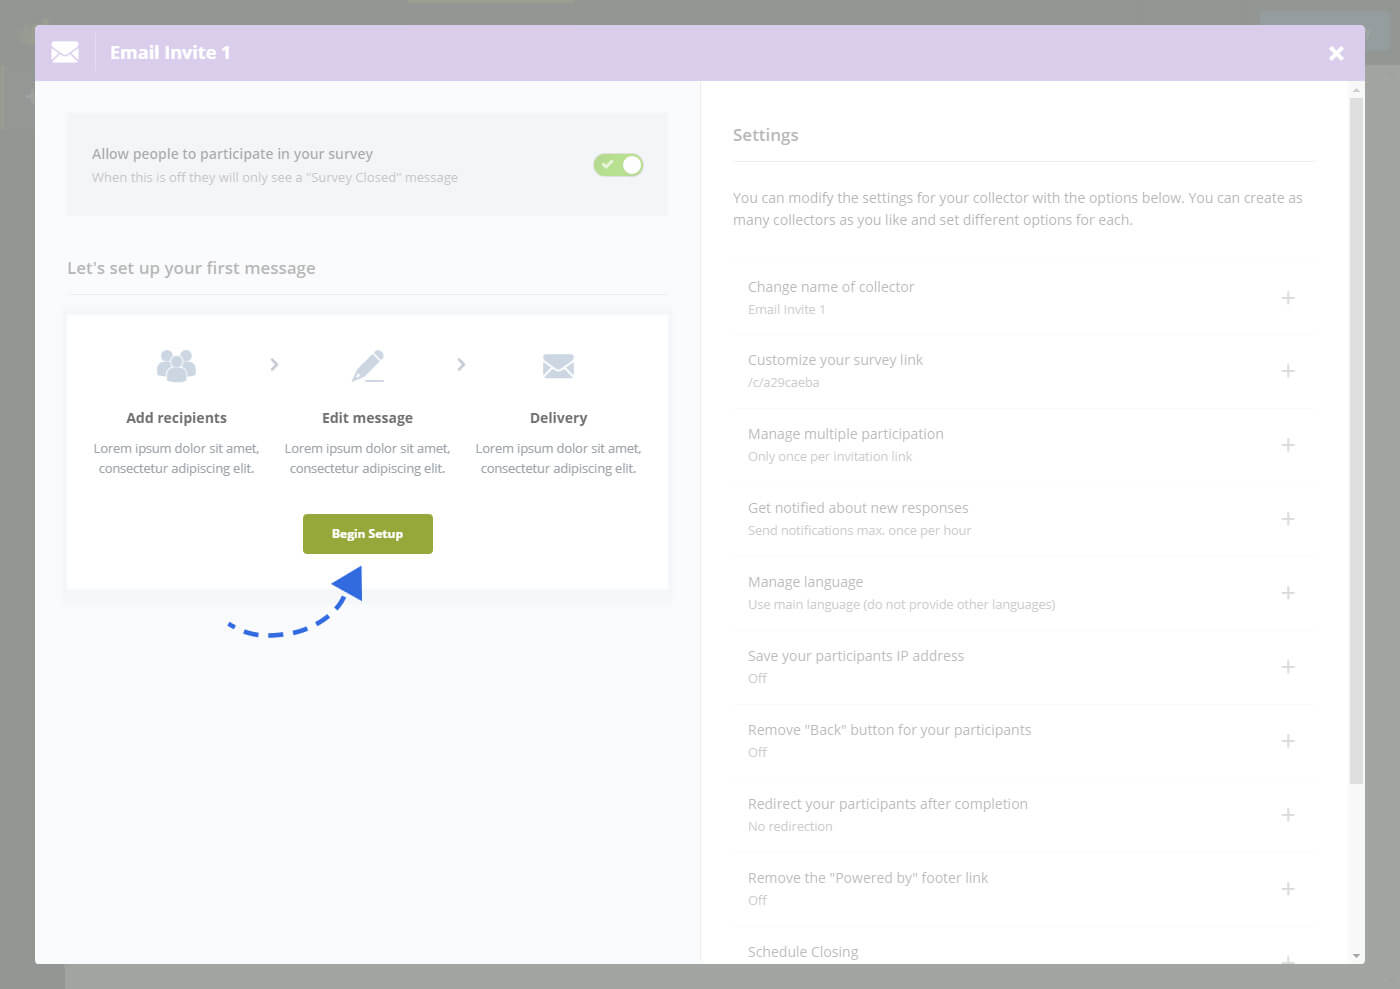
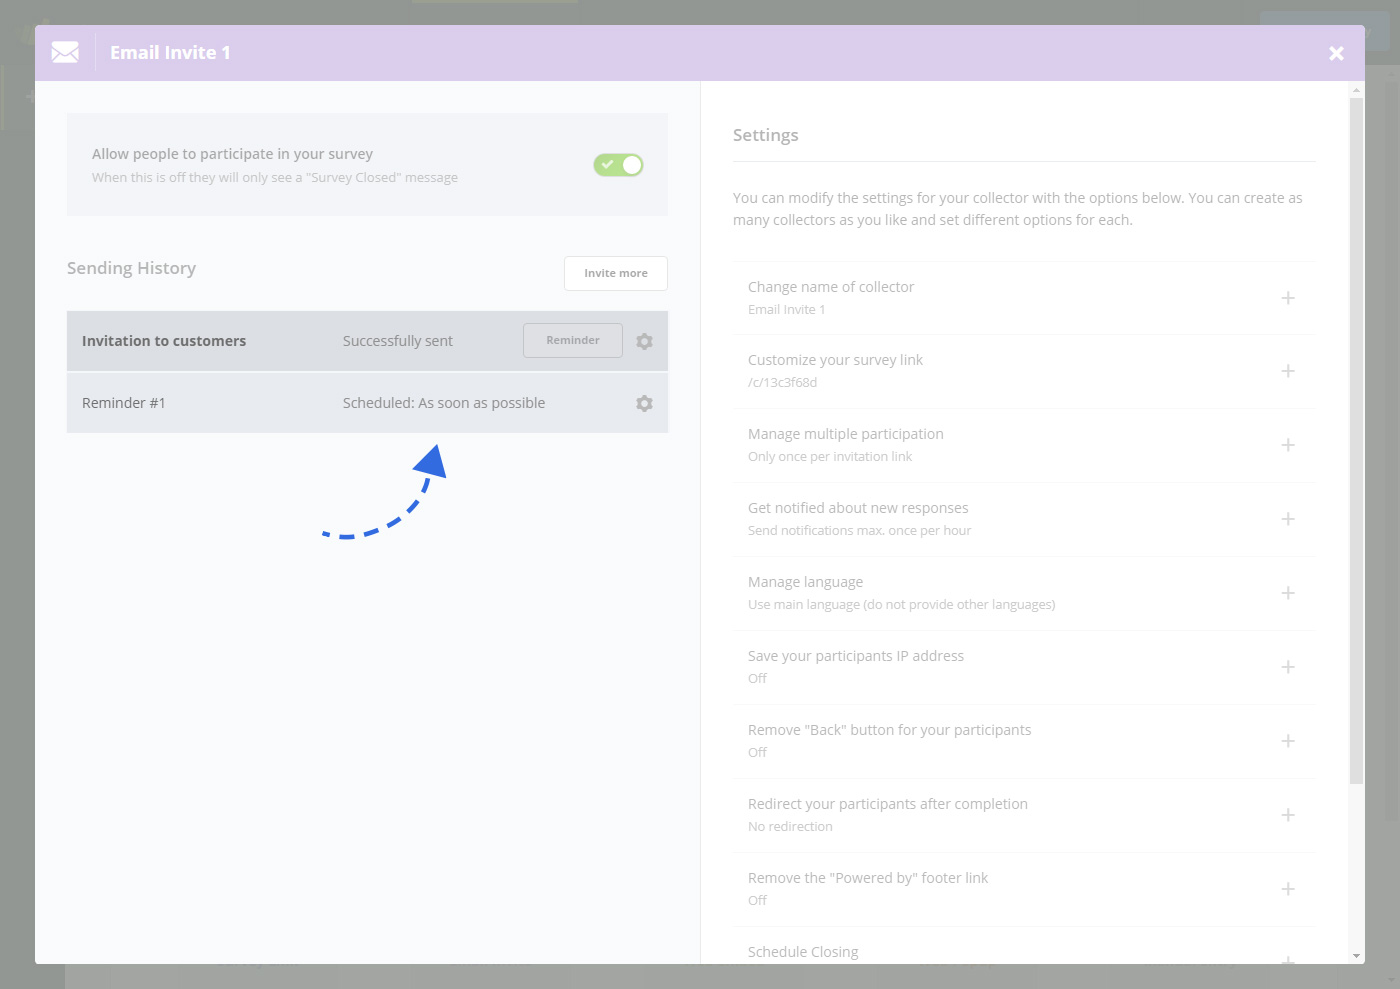
Once you have created your questionnaire, you are ready to share it with the world and start collecting results. To send your survey invitation via email from within the tool, you will need to go to the “Collect Responses” area of your survey and create a new “Email Invite” collector. This will then take you to the “Overview” screen. Here you will be able to manage the overall collector settings and later also see a history of the sending you have made. Click on the “Begin Setup” button to create your first invitation.

Add recipients
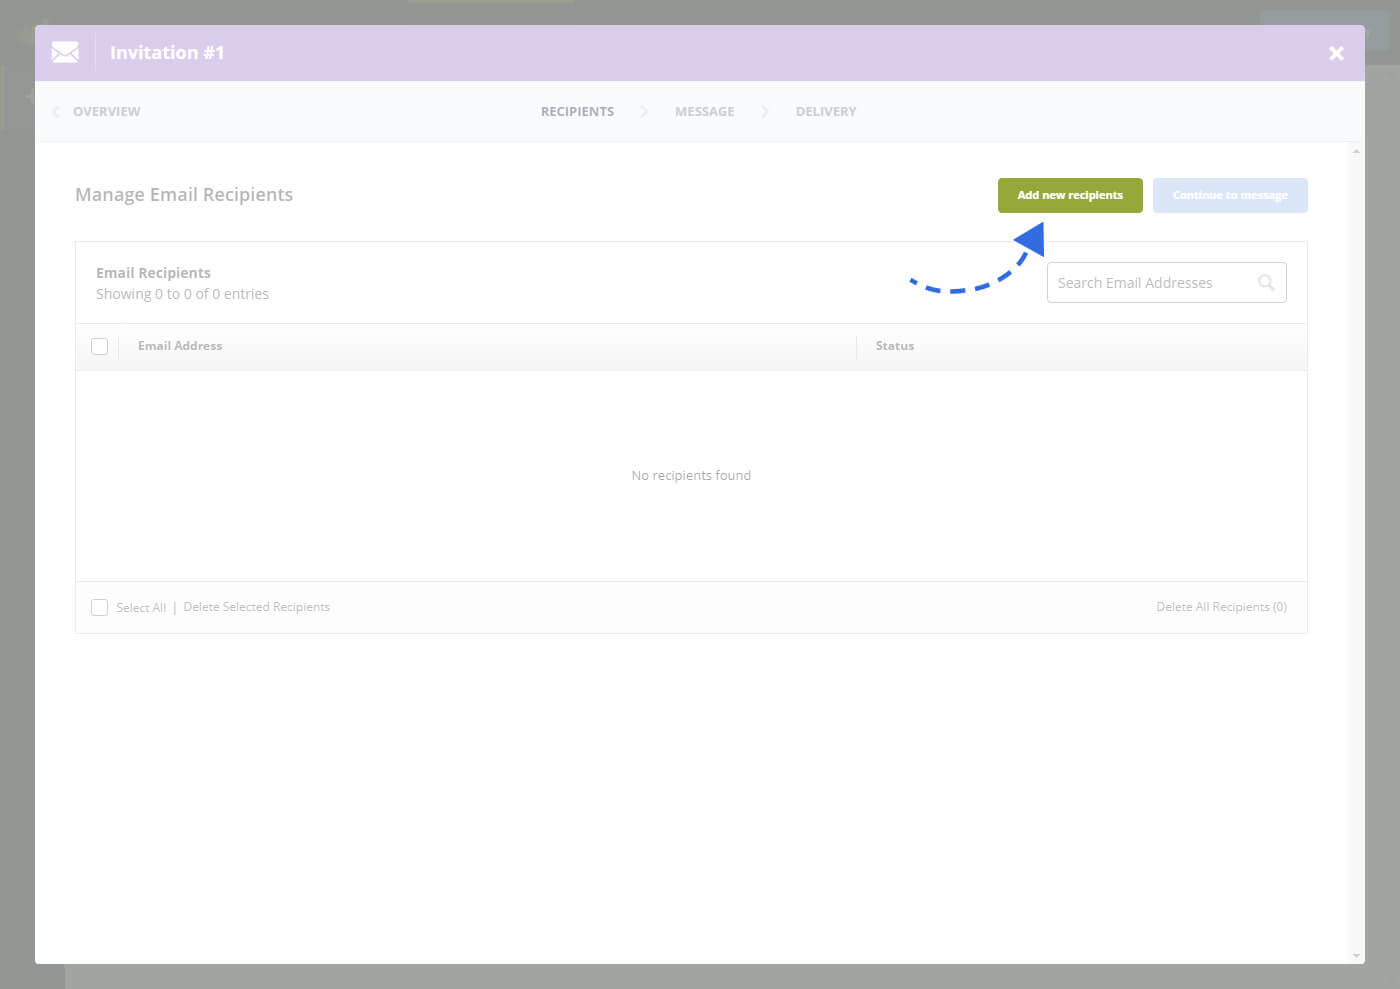
When you start to set up your invitation, the first step you will see will be “Manage Email Recipients”. Here you will see a table of all the recipients you have added to the sending. The table is of course empty at the beginning, so click on the “Add new recipients” button to continue.
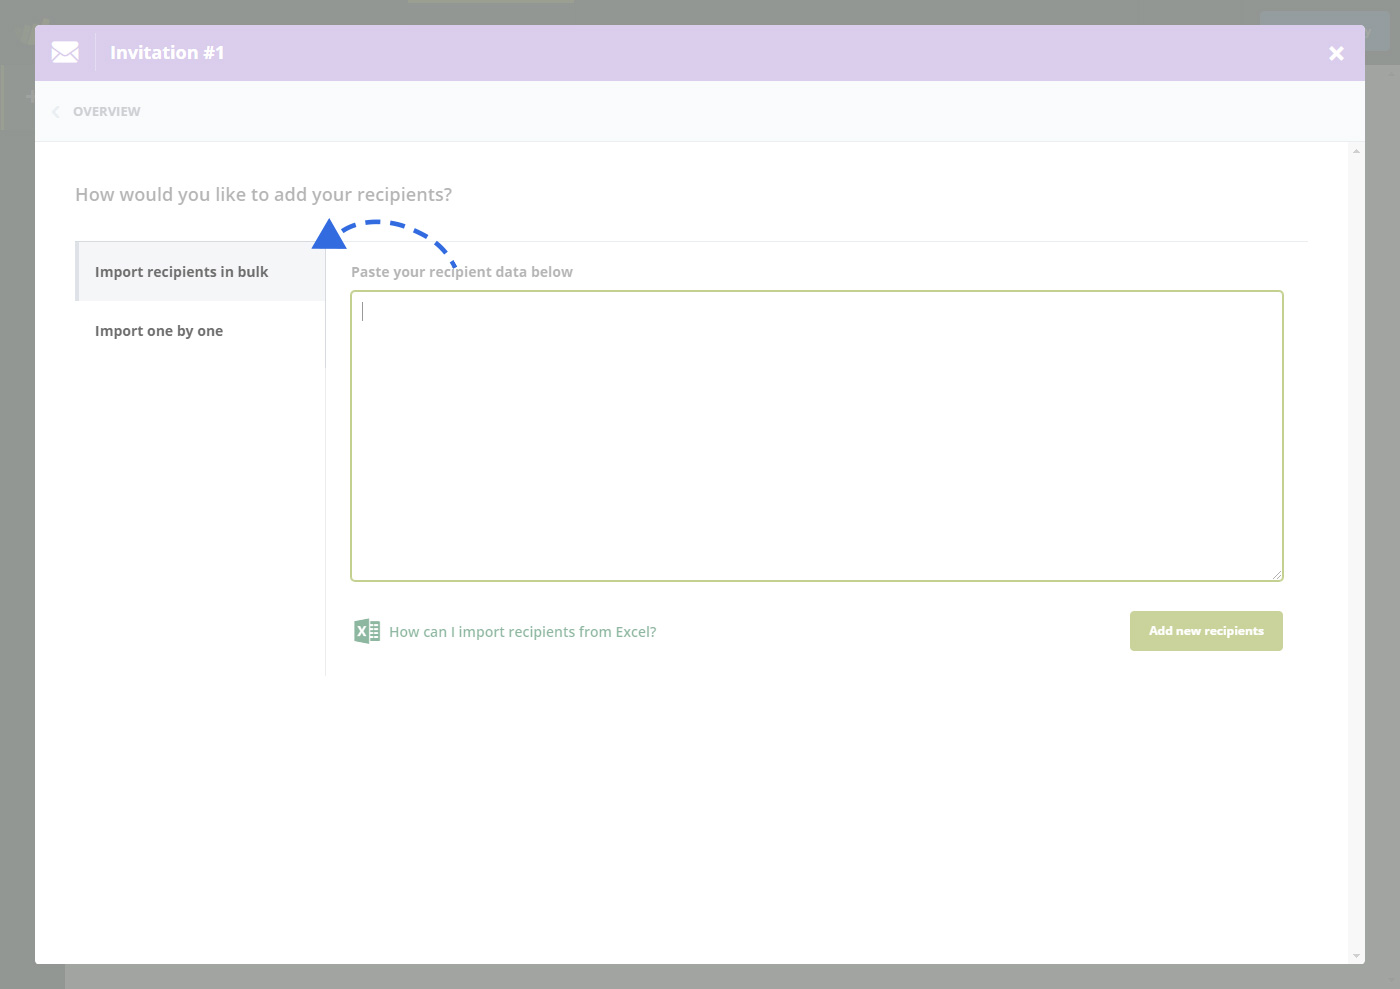
You can add new recipients in three different ways:
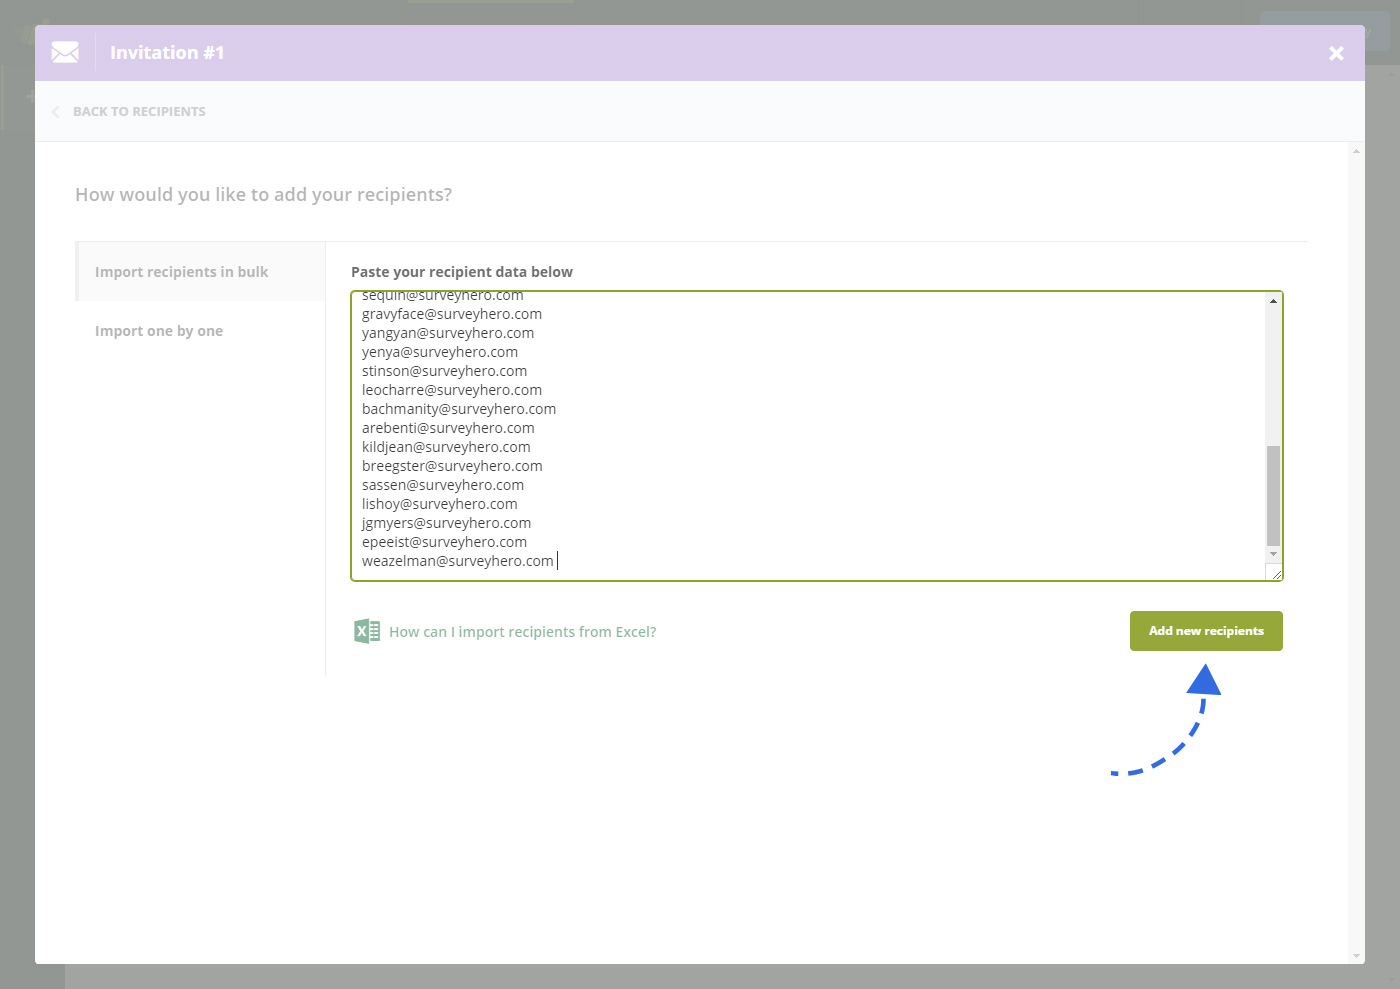
1) Importing only emails
The “Import in Bulk” method is extremely easy. All you need to do is copy a list of emails from Excel, paste them into the box and click “Add new Recipients”.
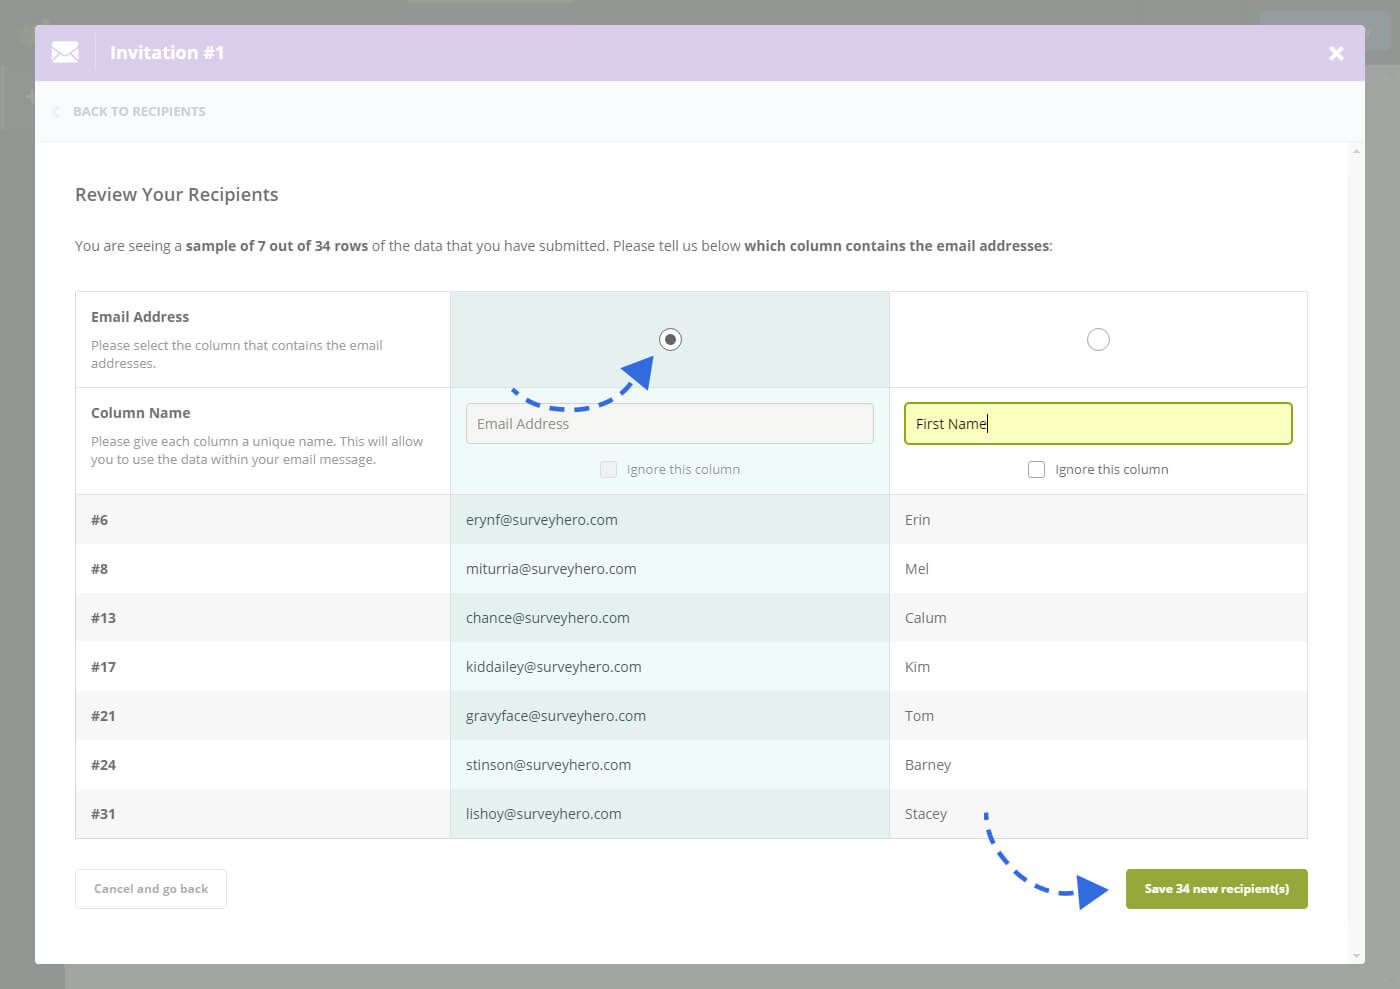
2) Importing emails and additional information
You can also import extra data columns by using the same “Import in Bulk” method, except this time, copying multiple columns of information, like “First Name”, “Customer ID”, etc. When you paste them into the box and press the “Add new recipients” button, you will be taken to a screen where you will need to define each column.
You must choose the column which contains the email addresses first. After that, for each additional column, you must either give it a name or skip it. If you choose to skip the column then all the information in that column will not be added during the import.
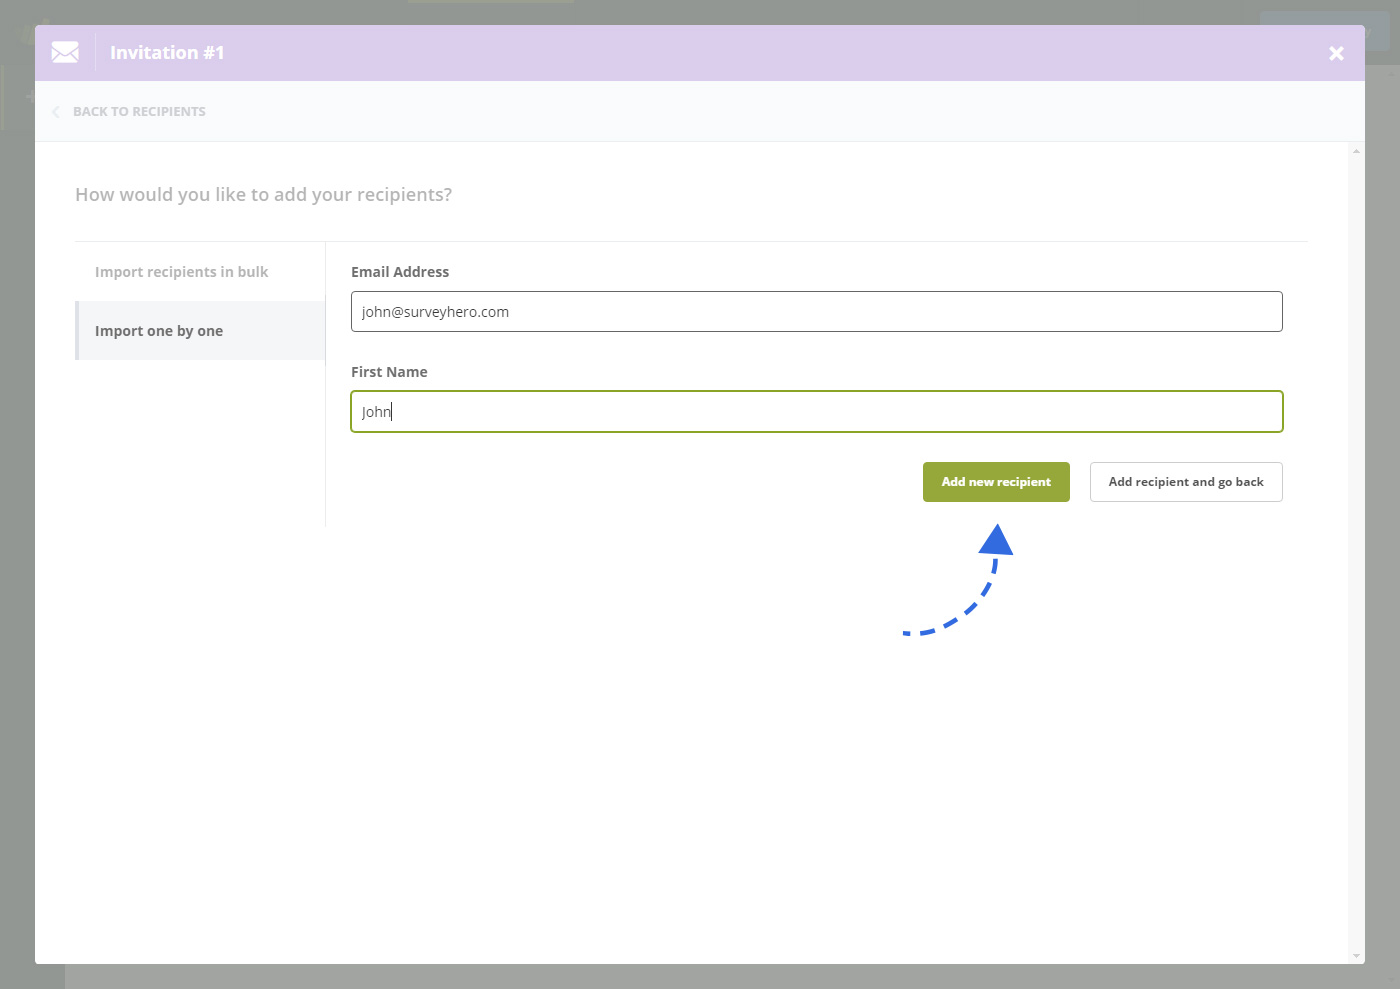
3) Adding recipients one by one
Another way you can add recipients is to use the “One by one” method. This is great when you have already added all your recipients but just need to quickly add one or two more. Any additional columns that you previously imported will also be shown.
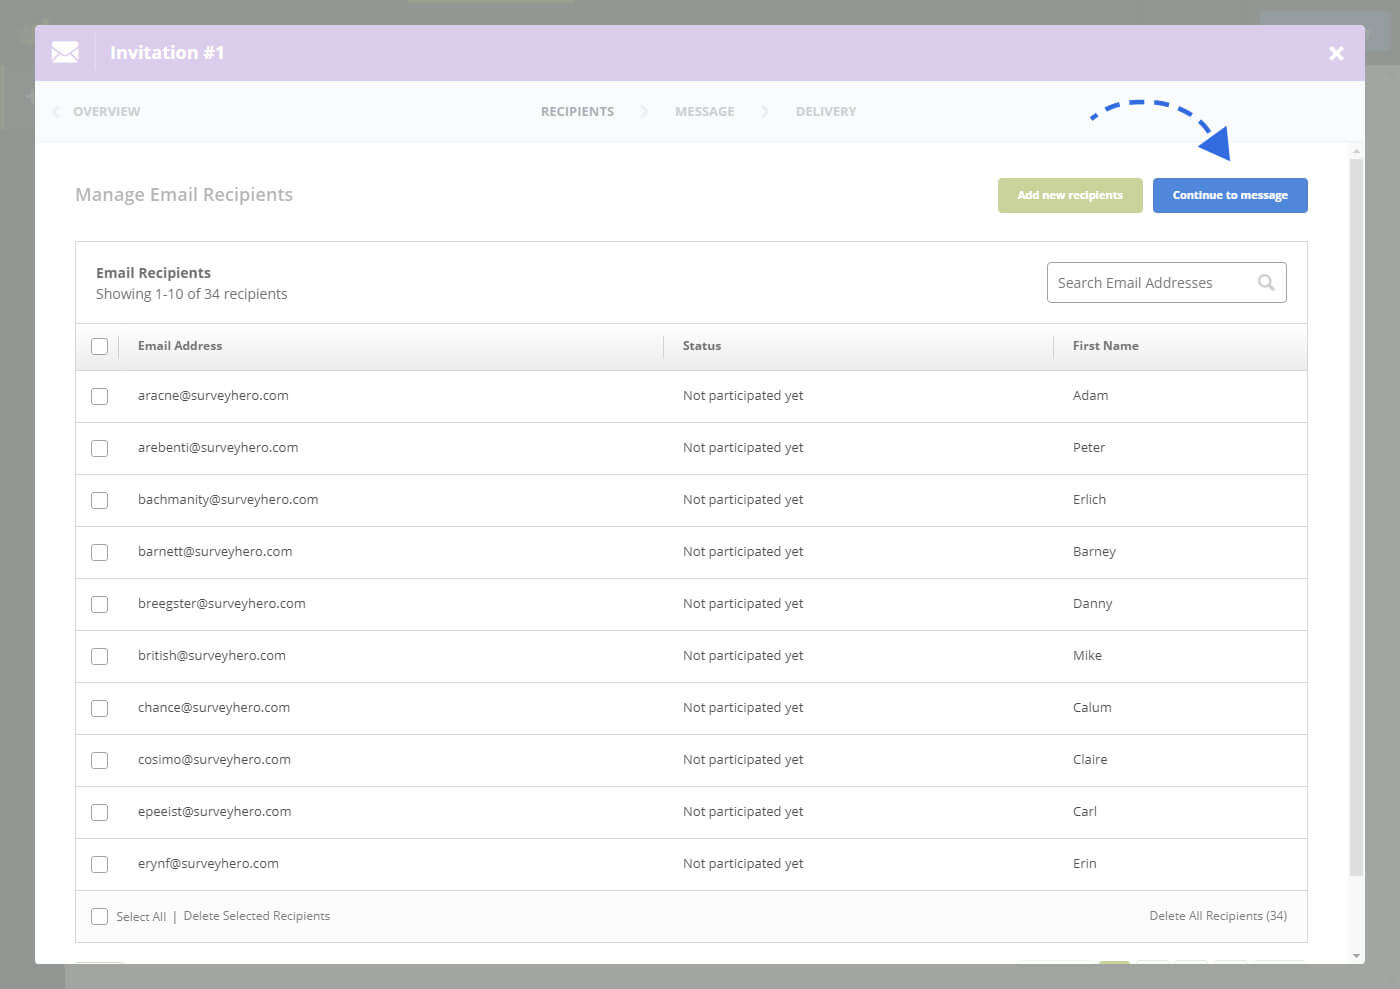
Whatever way you choose to add your recipients, you will always be taken back to the “Manage Email Recipients” screen, where you will be able to see and manage a table full of the recipients you just added.
Write your message
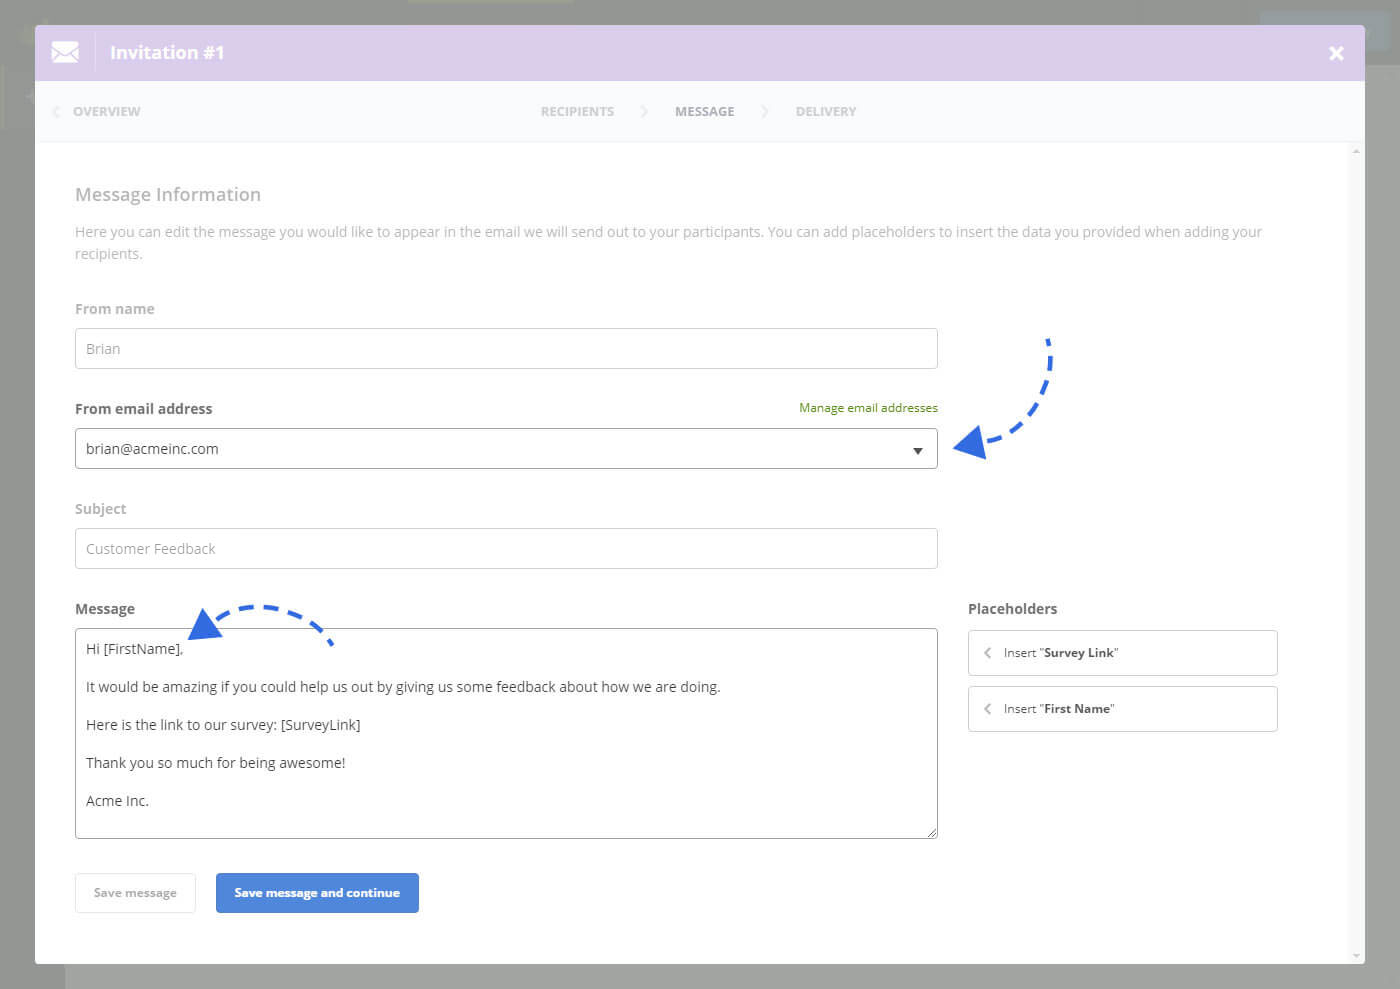
Now that you have successfully added your recipients, it is time to set up the message that will be sent. There are a few things that you must do to make sure your message is valid. The first thing is to make sure you have set up a verified email sending address. To manage your “sending addresses” click on the “Manage email addresses” link above the drop-down. This will take you to your account, where you will be able to add the email address in which you would like to set the “From address” to in your invitation. Once you have followed the steps and verified your email address, you will be able to choose it from the drop-down.
The second thing you will need to do is finish off your message by giving it a subject and customizing the text that will be used in the invitation. You can add personalized texts to your message, such as a recipient’s “First name” by using placeholders.
The available placeholders will be determined by whatever data columns you imported when you were adding your recipients. You will see, in the default text we provide, that there is already a placeholder tag that looks like this: [SurveyLink] – This placeholder must be kept within your message or your invitation will not be sent. We will automatically generate the survey link and correct recipient data (e.g. “First name”) for each individual recipient when we process the sending.
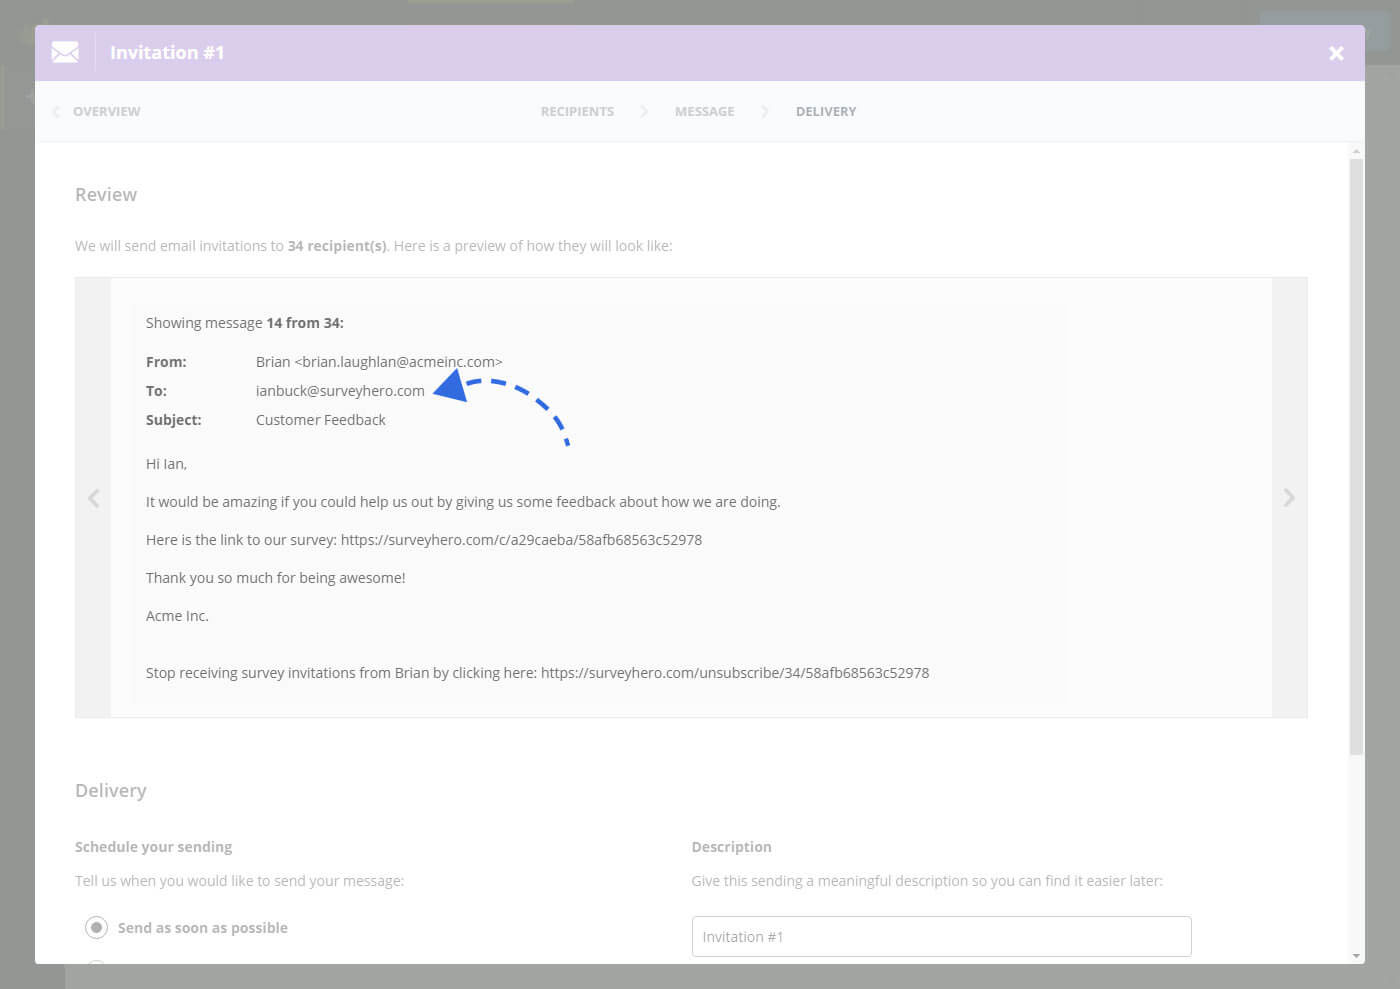
Each recipient will receive their very own survey link, which does by default only allow one single participation. This guarantees that you will only receive one response per recipient, blocking multiple participation in case the recipient forwards the link to others. If you want your recipients to be able to forward their link to others, you can override this setting from within the collector settings.
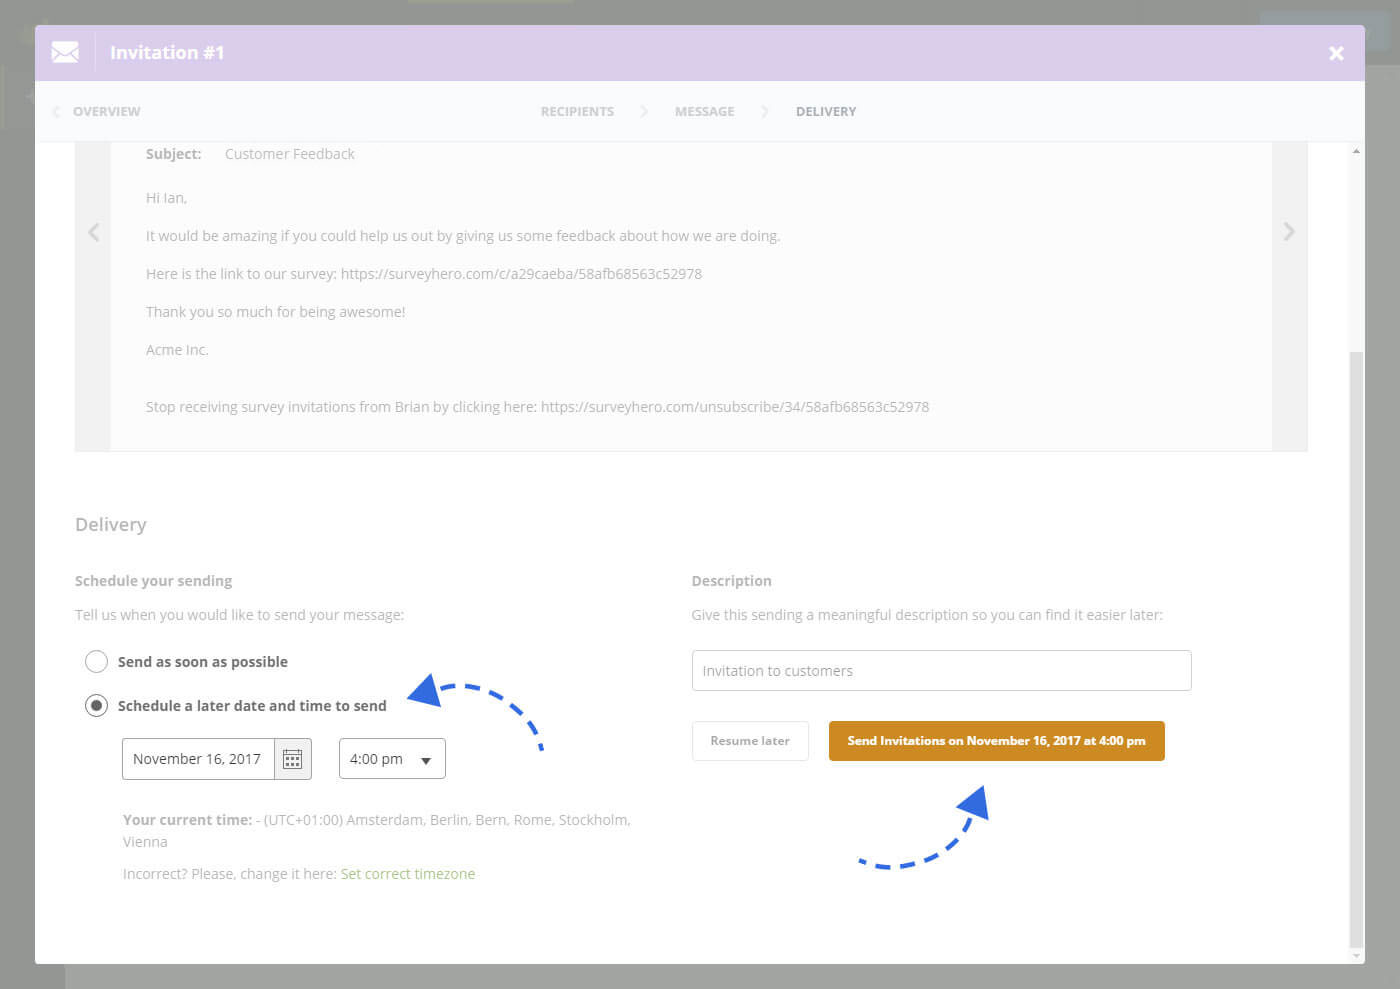
When you save your message and continue, you will be taken to the “Delivery” screen. This is where you will be able to see a preview of your message with actual recipient data where the placeholders were. This is a great way to see if you have put them in the correct place. We will also let you know here if you still need to complete any steps before you can submit your sending.
Schedule and submit
Once everything is set up, you can submit your email invitations for sending. If you choose “Send as soon as possible”, we will queue up your sending and your invitations we will be sent as soon as there is no more sending in front of you (submitted before you, by other users). Normally, sending are being started within a few minutes. Alternatively, you can also schedule your sending and specify an exact date and time in which you would like it to be sent.
You can also give the invitation a description that is only visible to you. Using a descriptive name per sending will help you to distinguish them later.
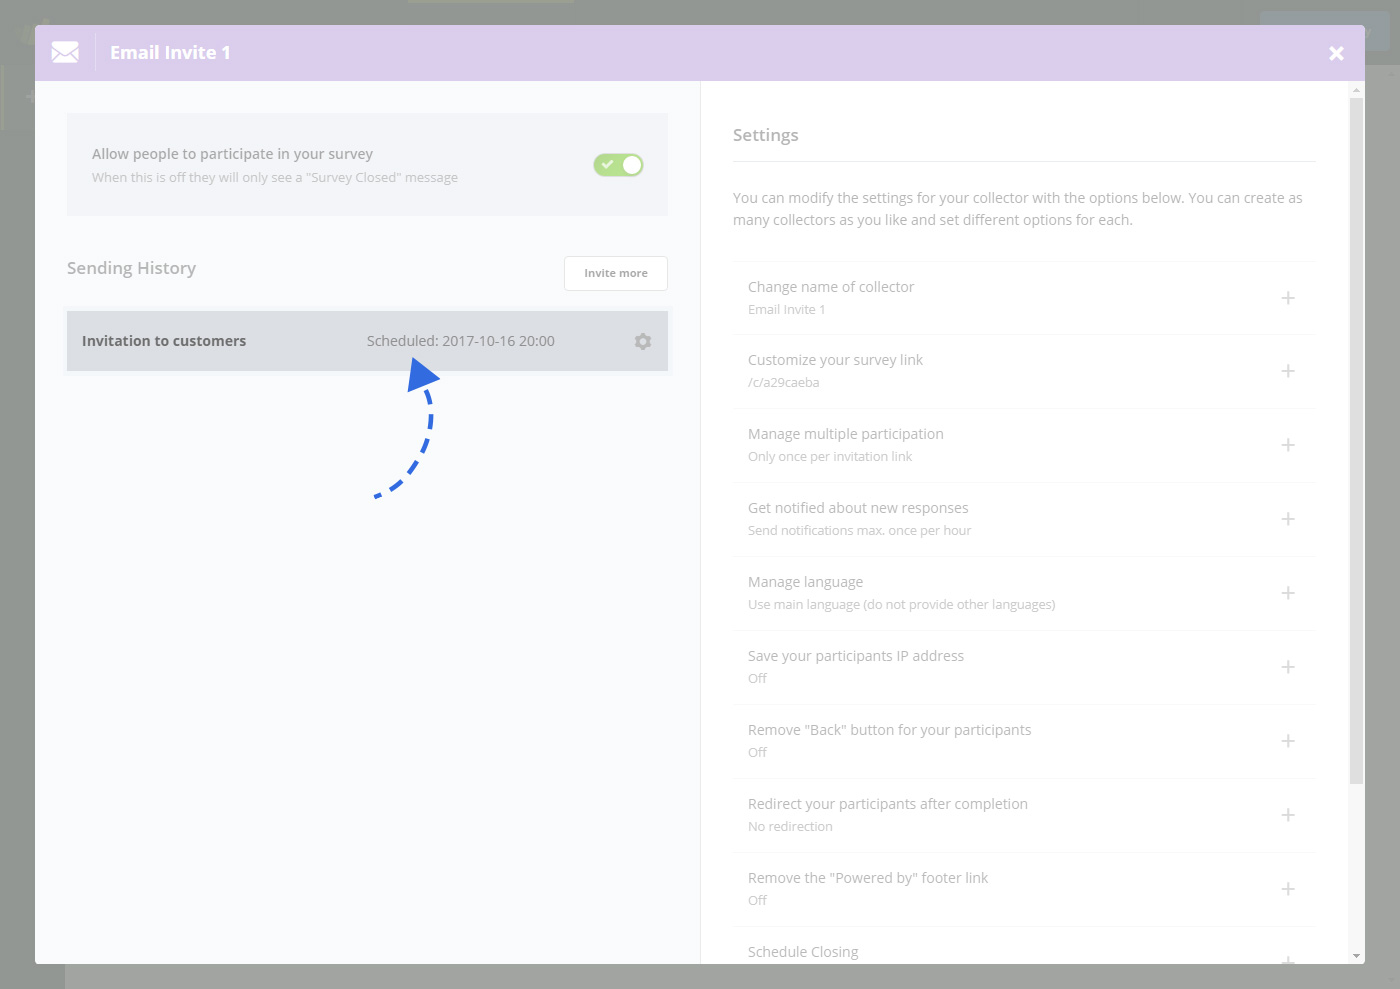
After you have submitted your sending you will be taken back to the overview screen where you will see that the status for the invitation has been set to “Scheduled”. At this point you can still cancel the sending, which will change the status back to a draft. However, when the scheduled time has arrived, the status will change to “Sending” and you will no longer be able to make any further changes. We will keep you up to date via email of the sending progress, letting you know about any bounced emails or problems.
That’s it, you have successfully sent out your first invitation!
How to send reminders
Create your reminder
Using the email invite collector is a great way for you to share your survey with a larger audience. However, you will find that not every recipient will participate in your survey after the first sending. There are many reasons for this, they could have missed the email, they may have opened it and decided to participate later, etc. For these reasons, we have built in the ability for you to send reminder emails to the same list of participants from the previous sending.
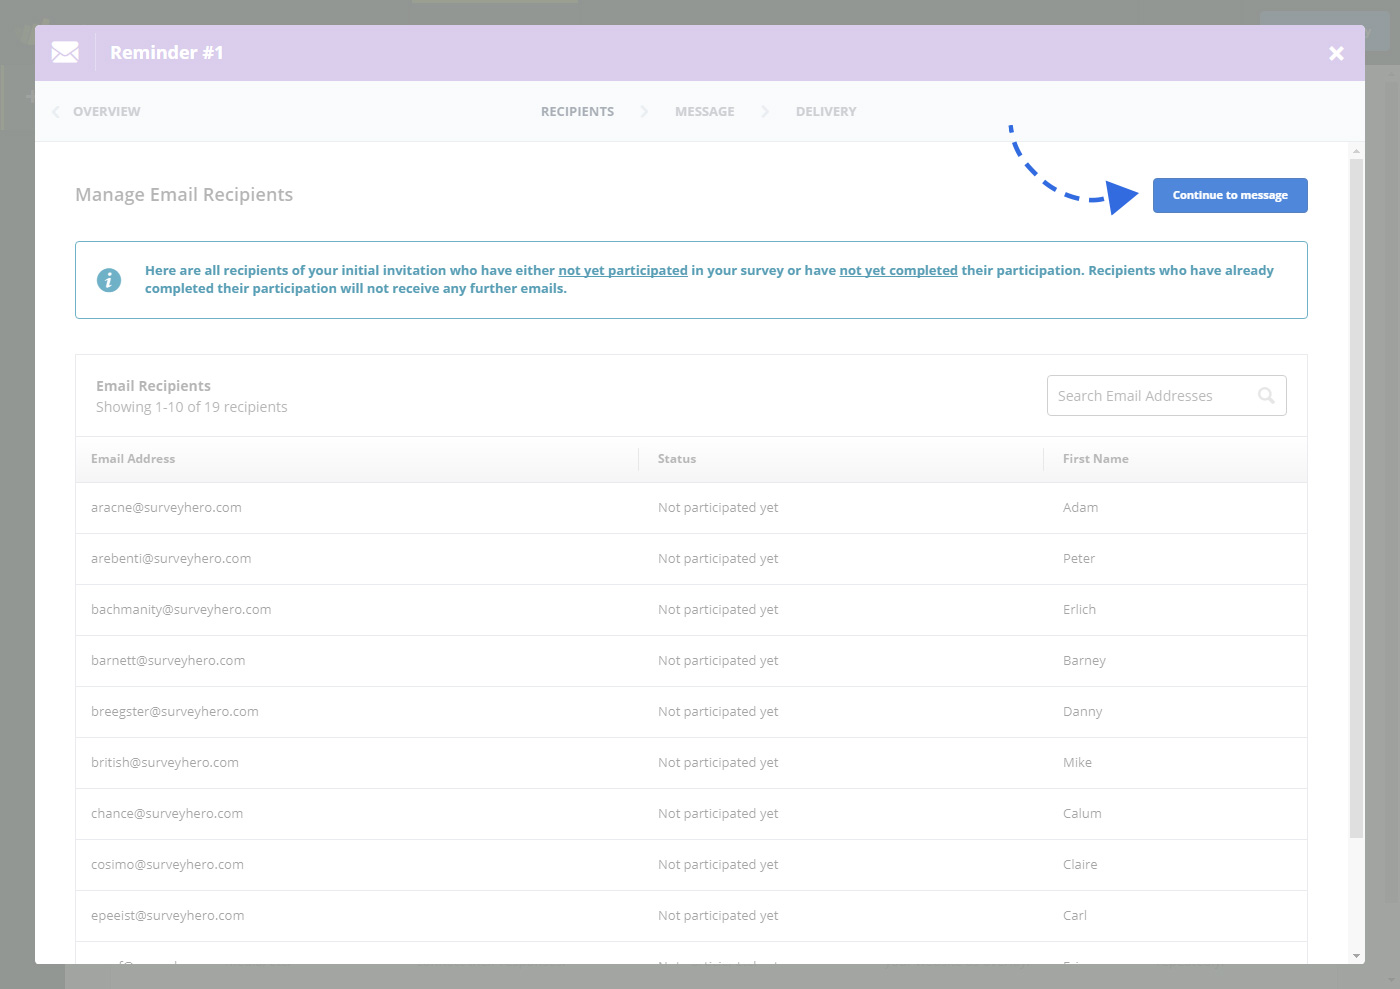
We will automatically take over the email recipients from the previous sending and you will be only able to send reminders to recipients who have not participated at all yet or have started but not finished participating. Recipients who already started the survey will automatically land on the page that they were on, they will not need to start again. You can create a reminder from the “Sending History”. You will see a “Reminder” button next to the invitations you have successfully sent. Clicking on that button will take you into a new sending, however, this time you will no longer be able to add any extra recipients.

Update Message and submit
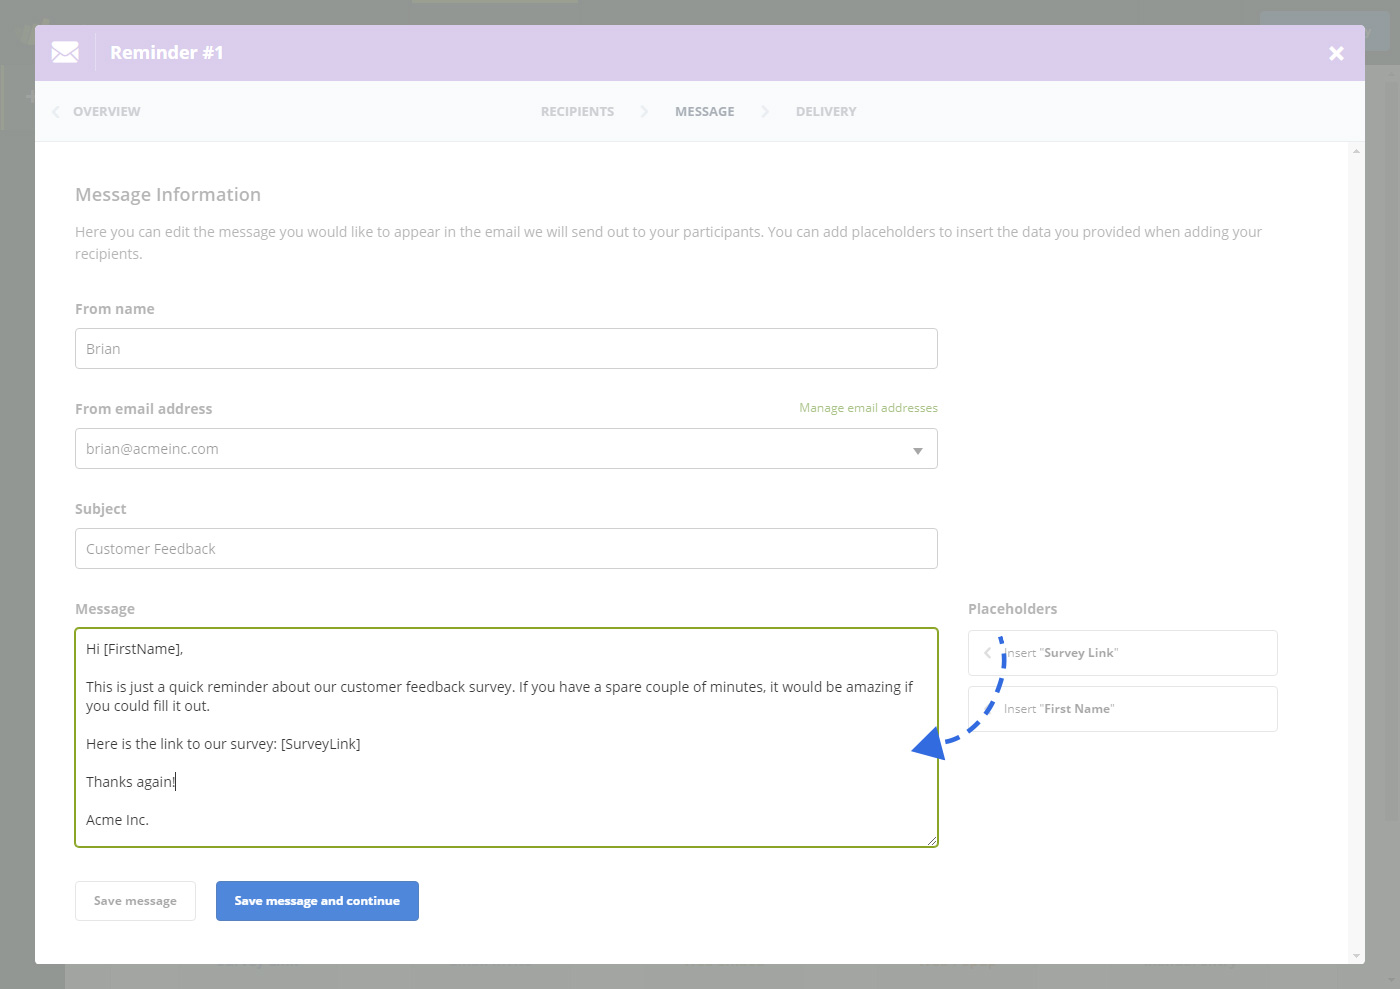
We will automatically bring over the text from the last message you sent. This should make it easier for you to update the text to inform the recipients that this new message is a reminder (e.g. simply prepend “Reminder:” to the subject). Once you updated your message text, simply go to the “Delivery” step and schedule your reminder to be sent, just the same way as you have already done for the invitation. When you submit you will be taken back to the “Sending History” where you will be able to see your new reminder underneath the original invitation.
How to view who responded
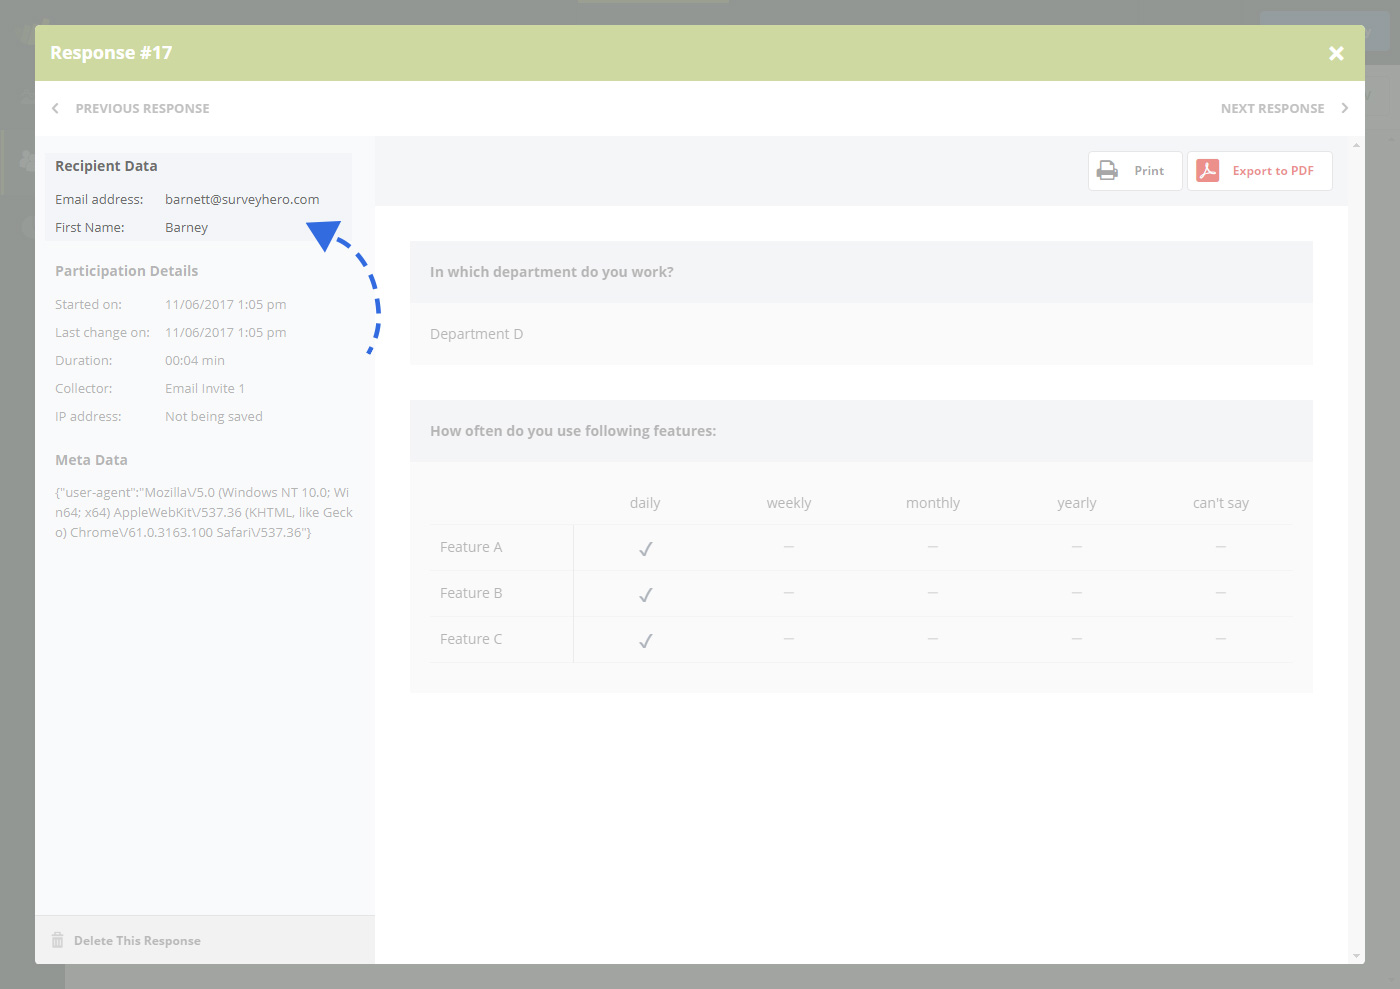
One of the most important benefits you will gain when using our email invite collector, is that each response will be inherently connected to a single recipient. This means you will see the email address and data from the recipients you sent to directly in each individual response as well as in your exports.